 click for larger image
Chocolate Mousse (November 2010) - original recipe by Barry L. Kramer
(last modified 26 Nov 2010)
Preparation time: about an hour
Cooking time: none, but you have to refrigerate overnight or more preferably
two overnights.
click for larger image
Loosely based on http://allrecipes.com/Recipe/Heavenly-Chocolate-Mousse/Detail.aspx
Recipe and procedure modified by BLK, first attempt 24 Nov 2010 [or download
as a Word document]
Makes approximately 6 servings (enough for one 9" pie)
Important: you will need an accurate electronic thermometer to reliably
make this.
Read the instructions before starting …. This is not a difficult recipe,
but some steps need to be done quickly.
Ingredients
do not make any substitutions except as noted
· 4 one-ounce squares Baker's semisweet chocolate, coarsely chopped
· 4 one-ounce squares Baker's bittersweet chocolate, coarsely chopped
· 1/2 cup water
· 2 tablespoons regular butter
· 3 egg yolks from "large" eggs
· 2 tablespoons sugar
· 1 1/4 cups heavy whipping cream
· 1 tsp vanilla (not imitation)
double if needed (for 8 people). It doubles easily.
Directions
1. Place ice and water into glass bowl to chill in preparation for whipping
the cream.
2. In a double boiler or two saucepans, slowly heat water in lower pan (no
hotter than when small bubbles form) to melt chocolate and butter together.
Stir with a rubber scraper once melting begins to achieve a uniform consistency.
Make sure all lumps melt, but don't overheat..
3. When melted, remove chocolate from heat, and stir in vanilla. Place on unused
burner to cool. Do not discard hot water yet.
4. In a small saucepan that will not be damaged with a wire whisk, whisk egg
yolks, sugar and water. Align the probe of the thermometer with the end of the
whisk and continuously whisk the mixture, tilting the pan so the (small amount
of the) mixture collects in the bottom and can be whisked and temperature probed
simultaneously. This takes some practice to hold the whisk and the probe together,
so you might want to try it a bit first…
5. While monitoring the temperature carefully, immerse the pan into the very
hot water, whisking continuously until mixture reaches exactly 160 degrees
F and attains a uniform yellow color and consistency (it will be frothy), about
1-2 minutes. It will heat quickly. As the temperature approaches 160 degrees,
remove the pan from the hot water so you do not go above 160. Put it back in
for only a few seconds at a time as needed to obtain exactly 160 degrees, while
whisking continuously with the wire whisk and the temperature probe.
6. When it is exactly 160 degrees, remove from heat. Whisk in chocolate
mixture to achieve a uniform consistency. The frothiness will give way to a
shiny, dark consistency. Place pan containing this mixture in refrigerator including
whisk. Remove it and whisk it briefly every 4 or 5 minutes throughout the next
step so it cools evenly without hardening on the sides.
7. Empty ice and water from mixing bowl into another container. Dry bowl; whip
cream using electric mixer at its highest speed in very cold bowl until stiff.
Time may vary with mixer. My old one took about 12 or 13 minutes, and my new
professional model takes about 5 minutes. Keep an eye on it. Don't forget to
continue to stir the chocolate mixture frequently and return it to the refrigerator.
8. When cream forms stiff peaks, stop whipping it. Remove chocolate mixture
from refrigerator. Mix again with whisk. Measure temperature. Cool as necessary
in the ice water, whisking constantly and measuring temperature, until the chocolate
mixture is 64 or 65 degrees F. It will have a gooey texture but will not have
hardened even on the sides if you have stirred it properly during cooling process.
It's important to keep it well mixed so it doesn't harden, and cold enough to
not damage the whipped cream.
9. Quickly add the chocolate mixture to the whipped cream and fold in, gently
but quickly using rubber scraper. Run the mixer (medium to high speed) but for
only a few seconds at a time to mix it; scrape and repeat twice. Remove from
mixer and use the rubber scraper to scrape up and manually mix anything that
isn't uniform. This step needs to be done quickly because it must mix into a
uniformly colored mixture before the cold whipped cream congeals the chocolate
mixture and damages the smooth texture. Use rubber scraper to scrape bottom
and sides and complete folding in to a uniform mixture. Hurry up!
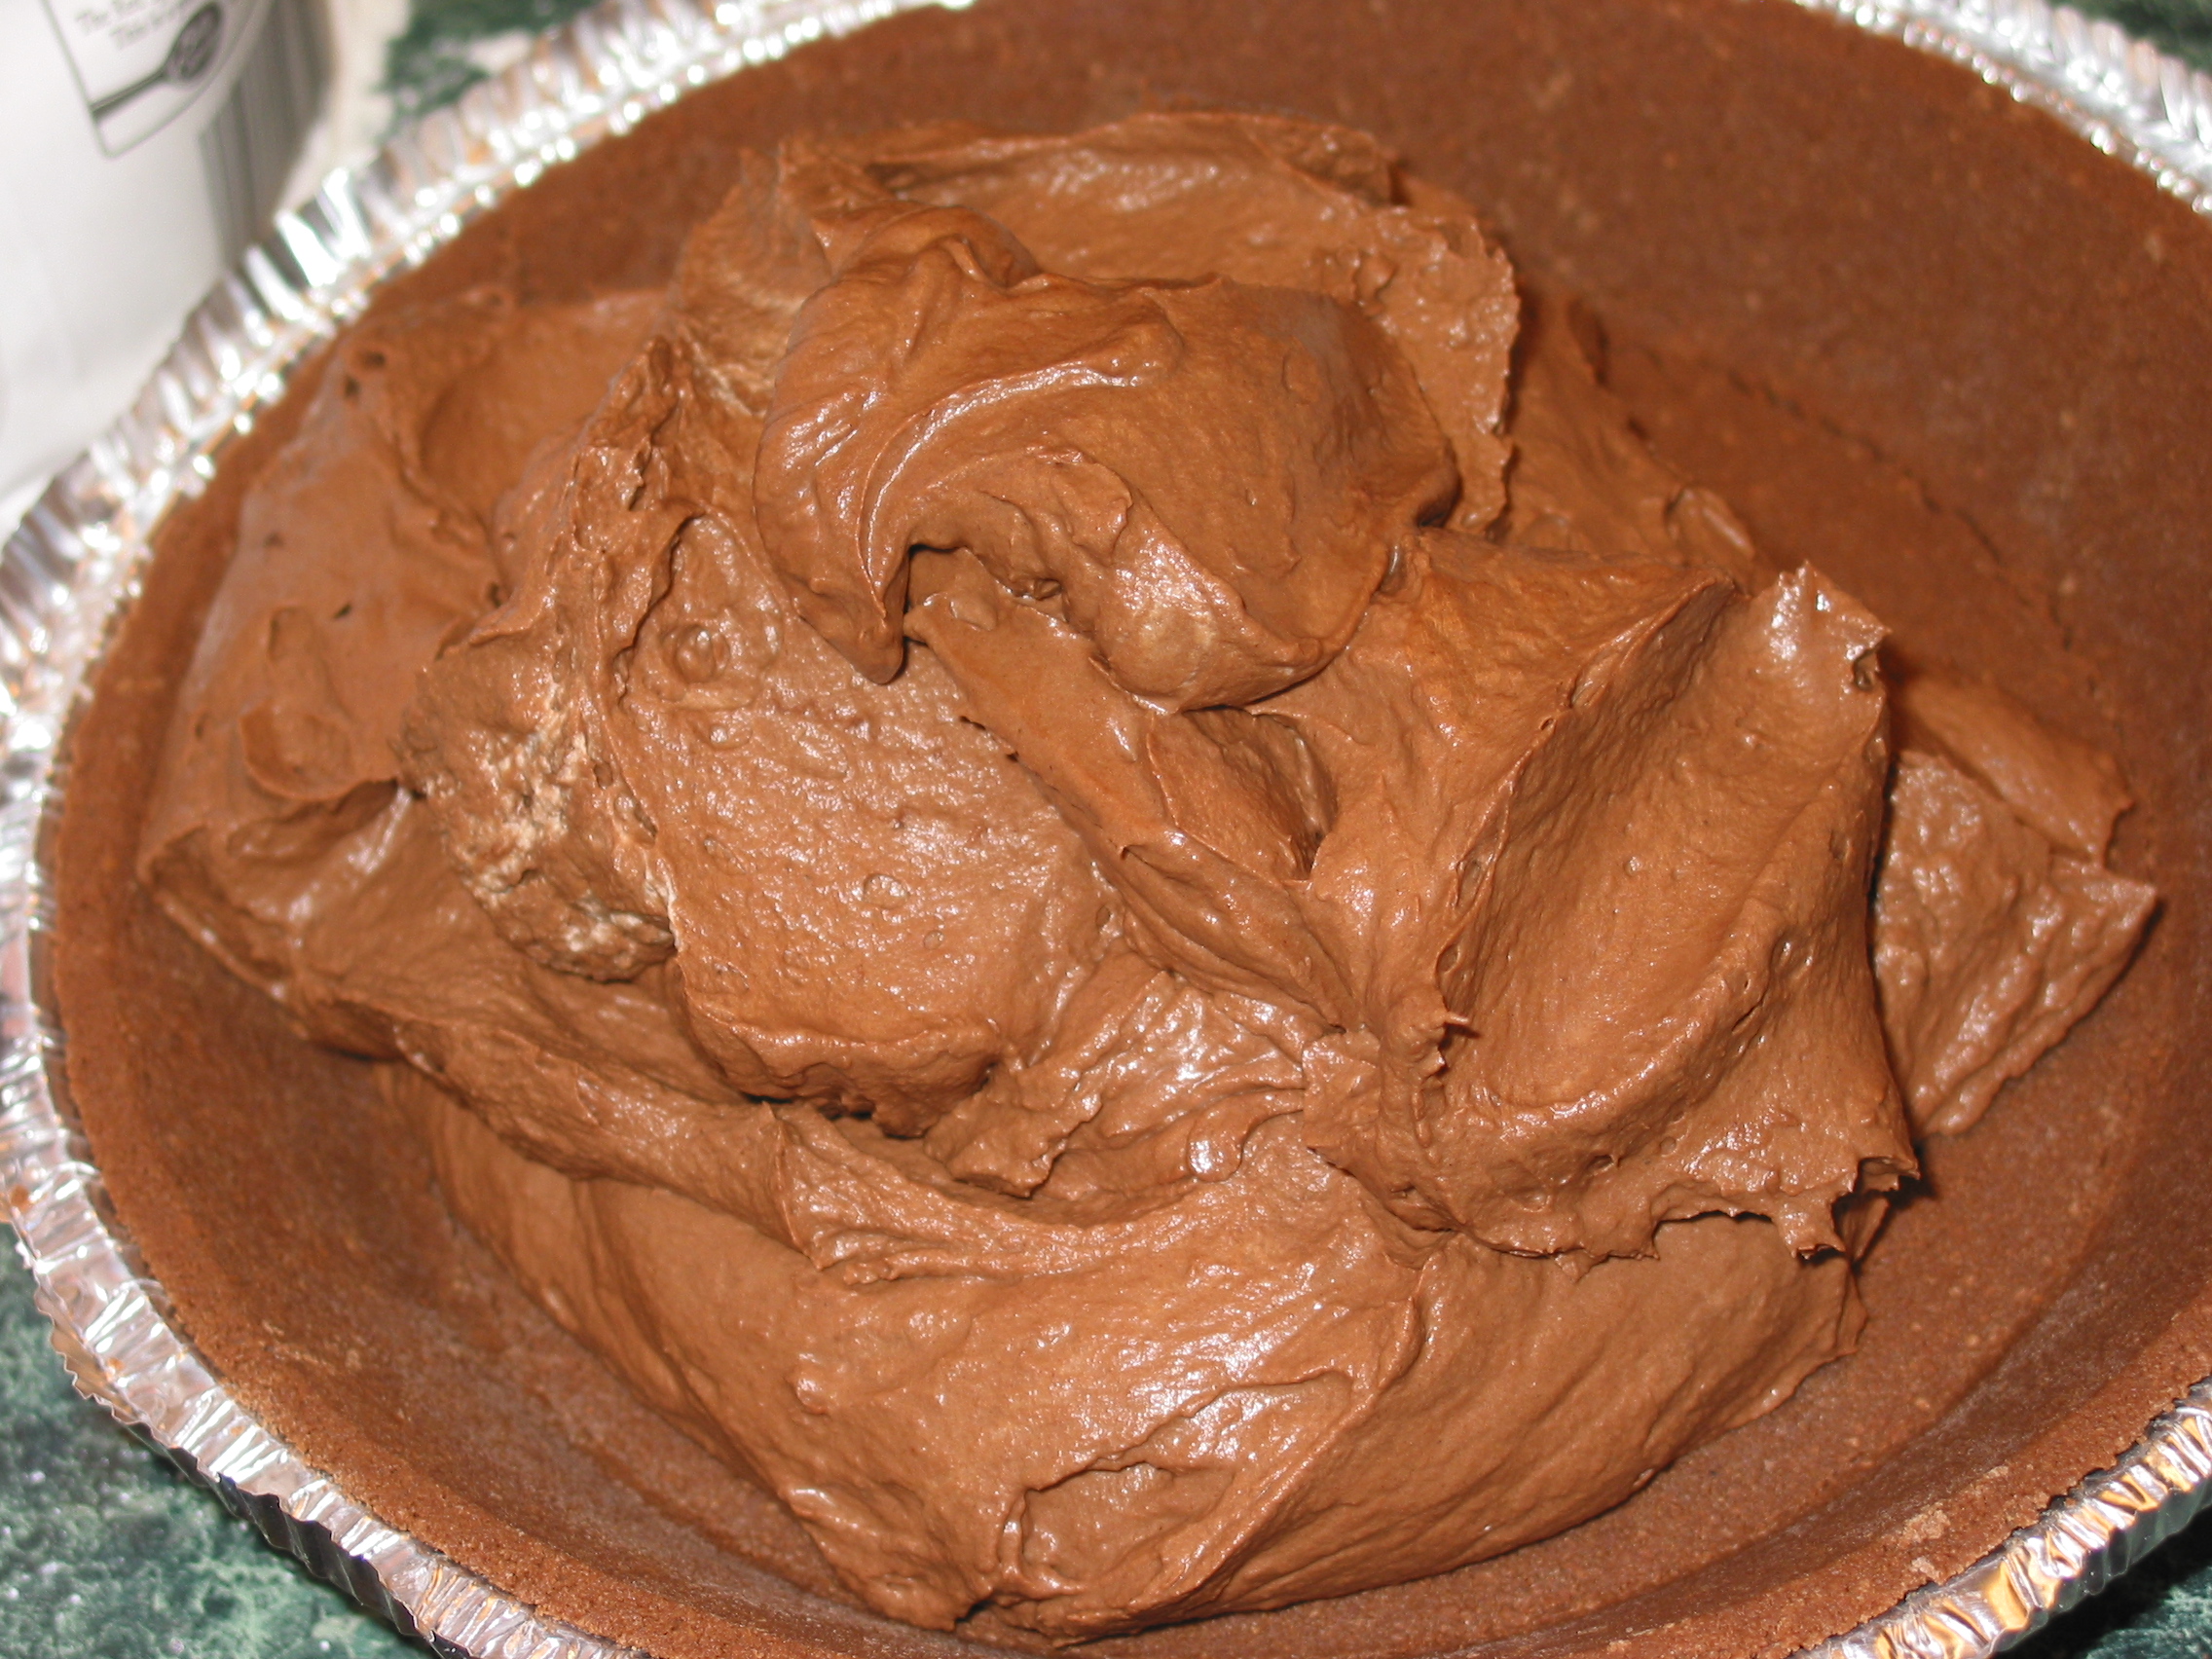
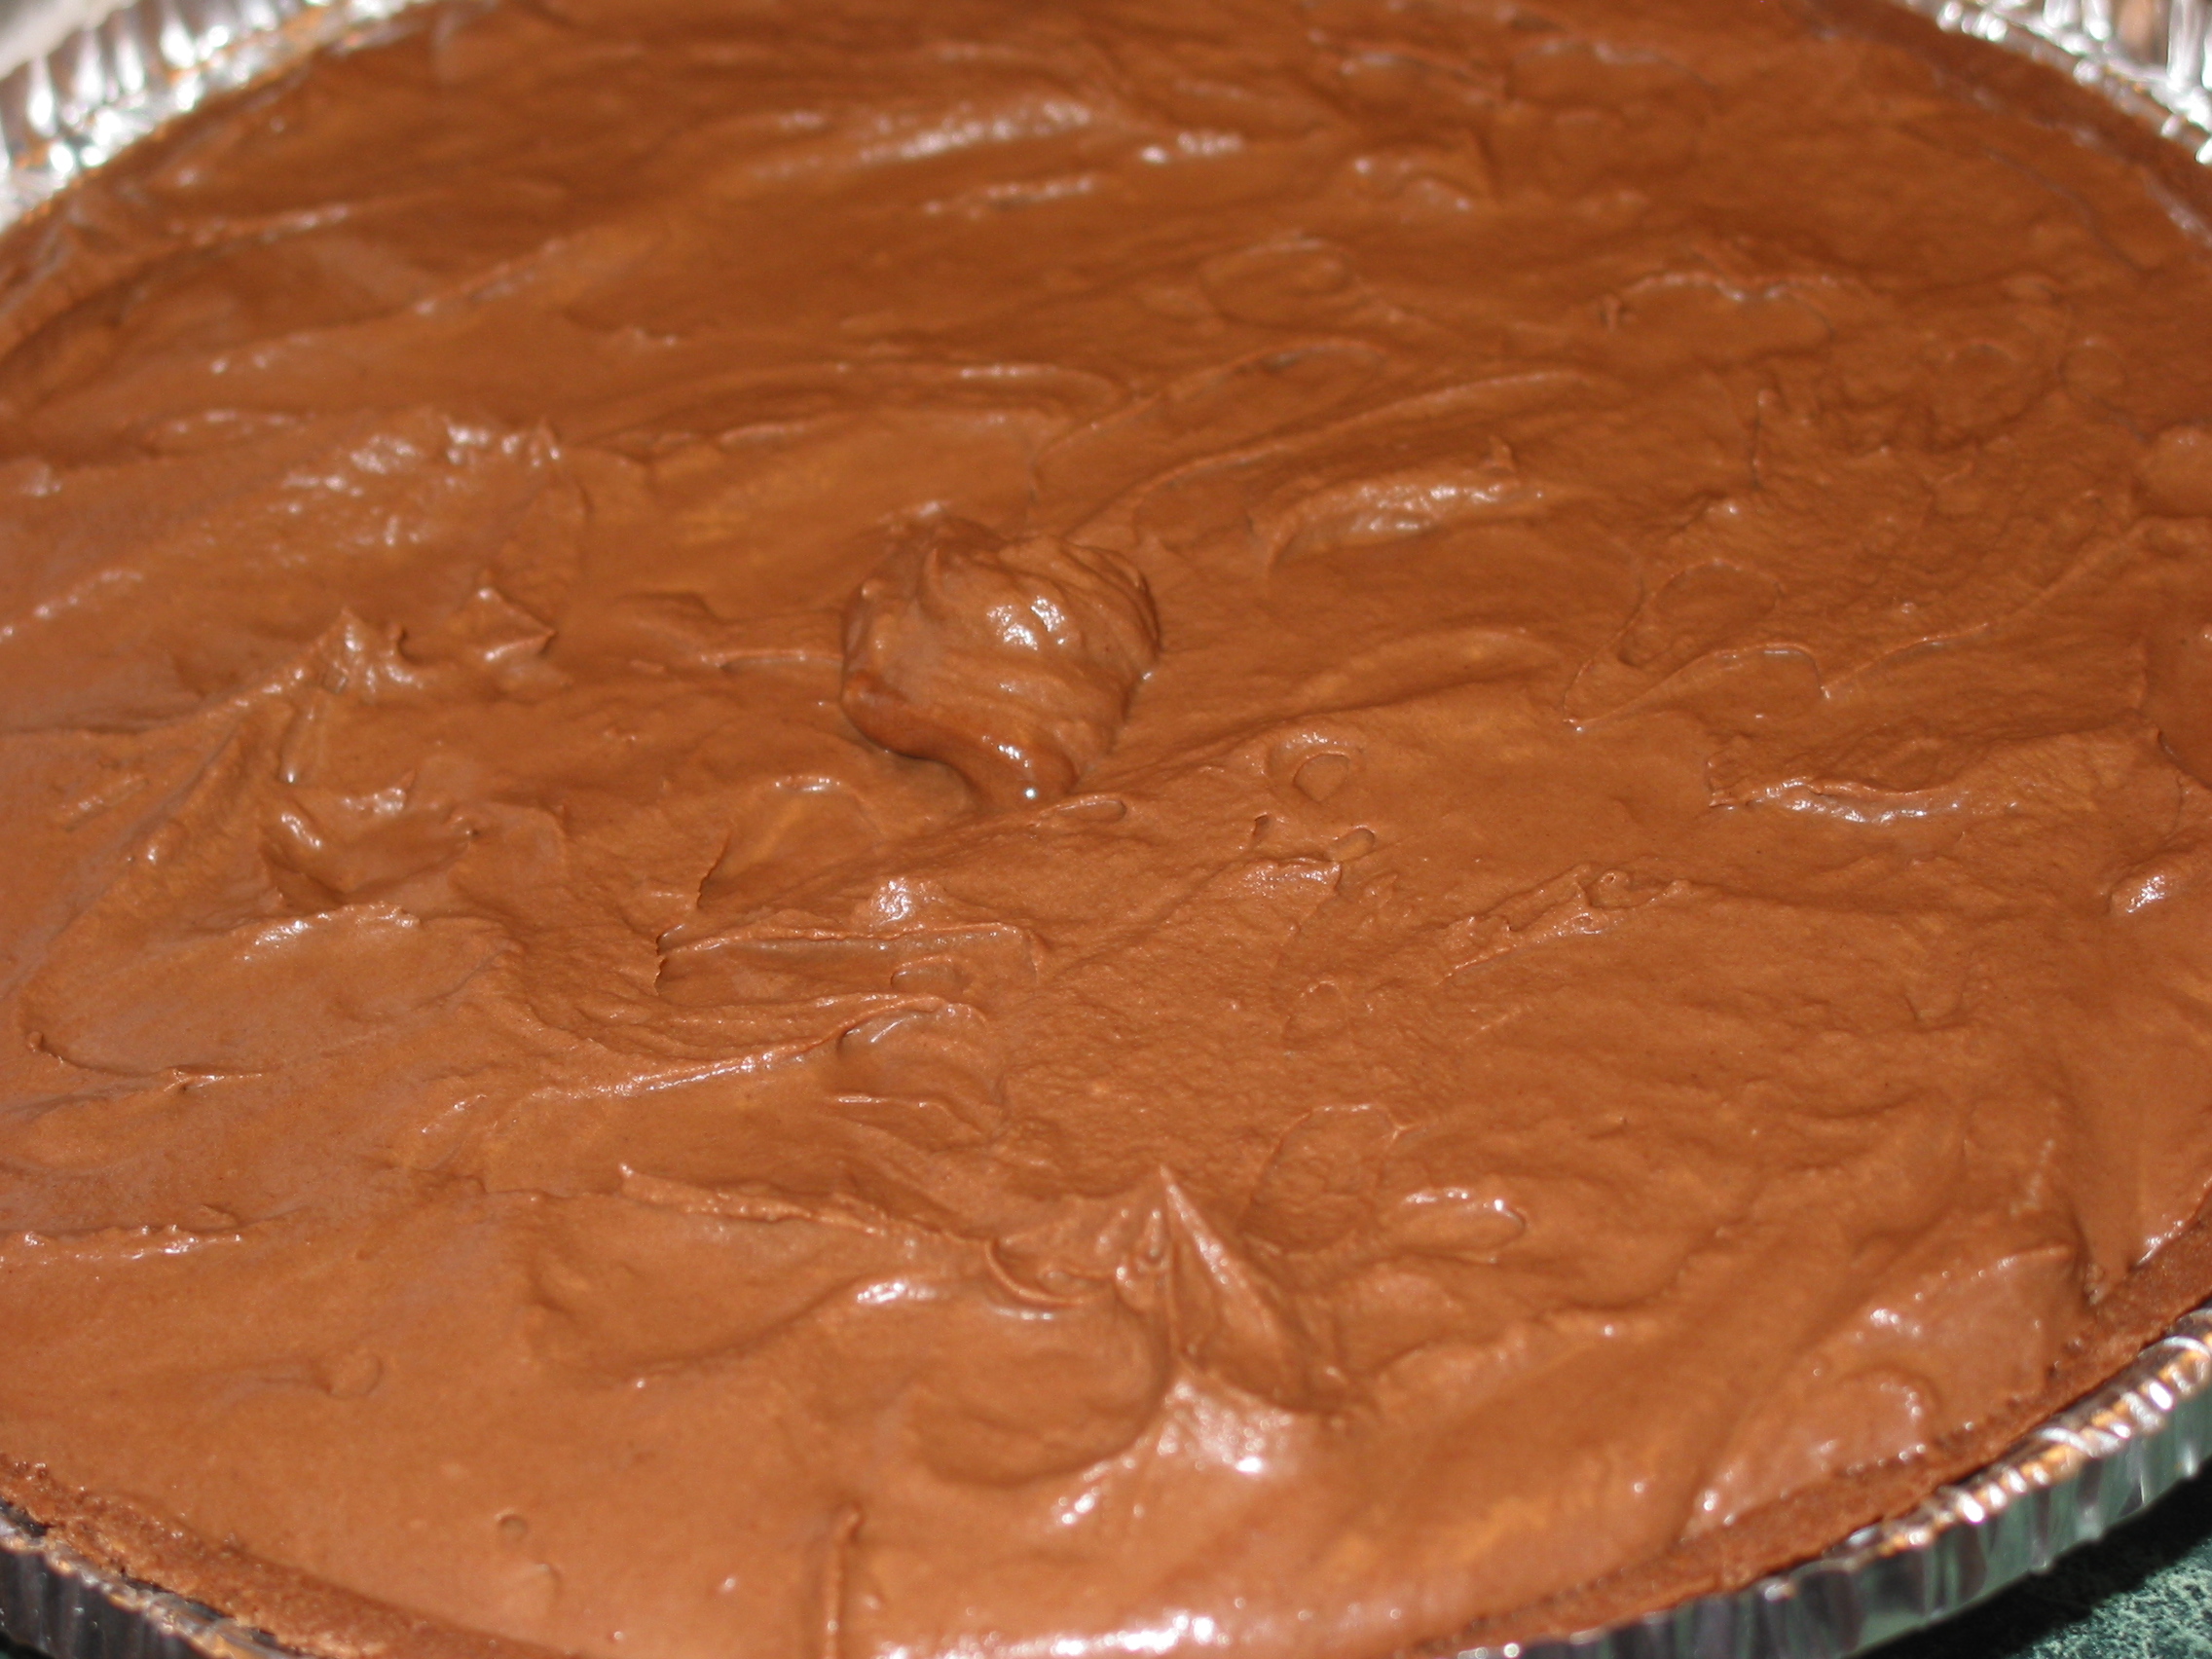
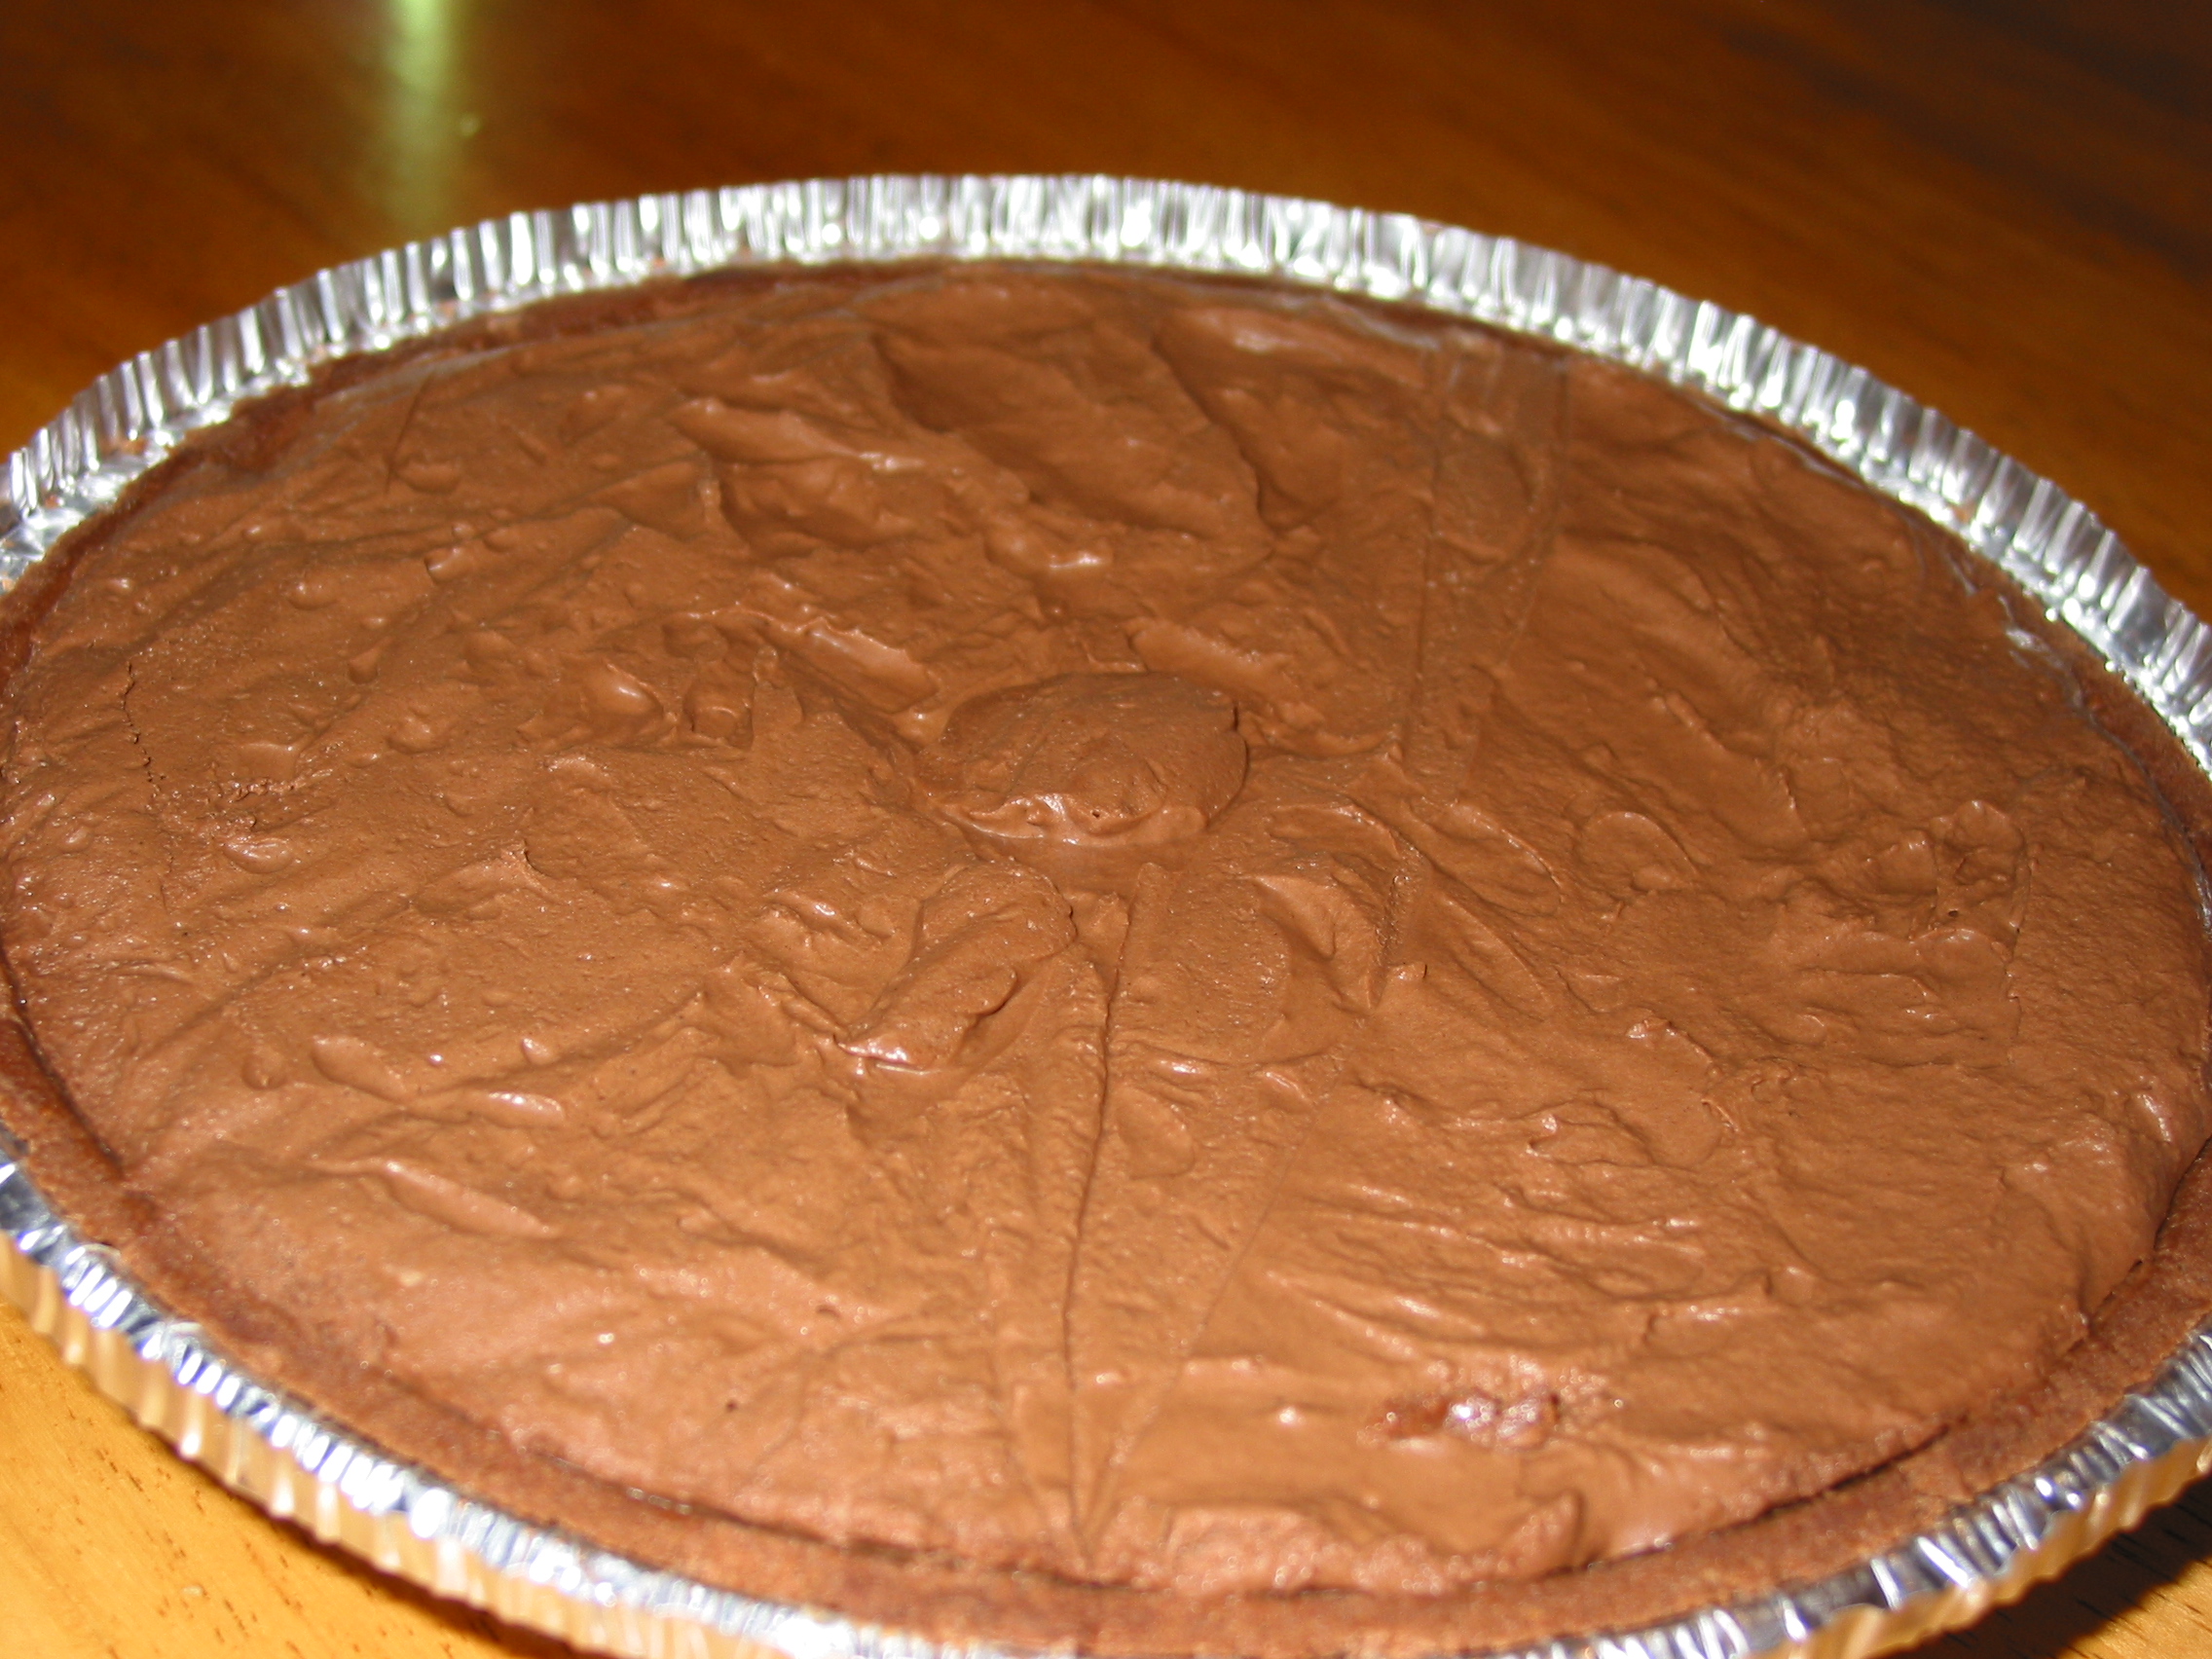
10. Spoon into dessert glassware or a
pie shell (image1 image2).
It's rich, so plan to serve smaller portions.
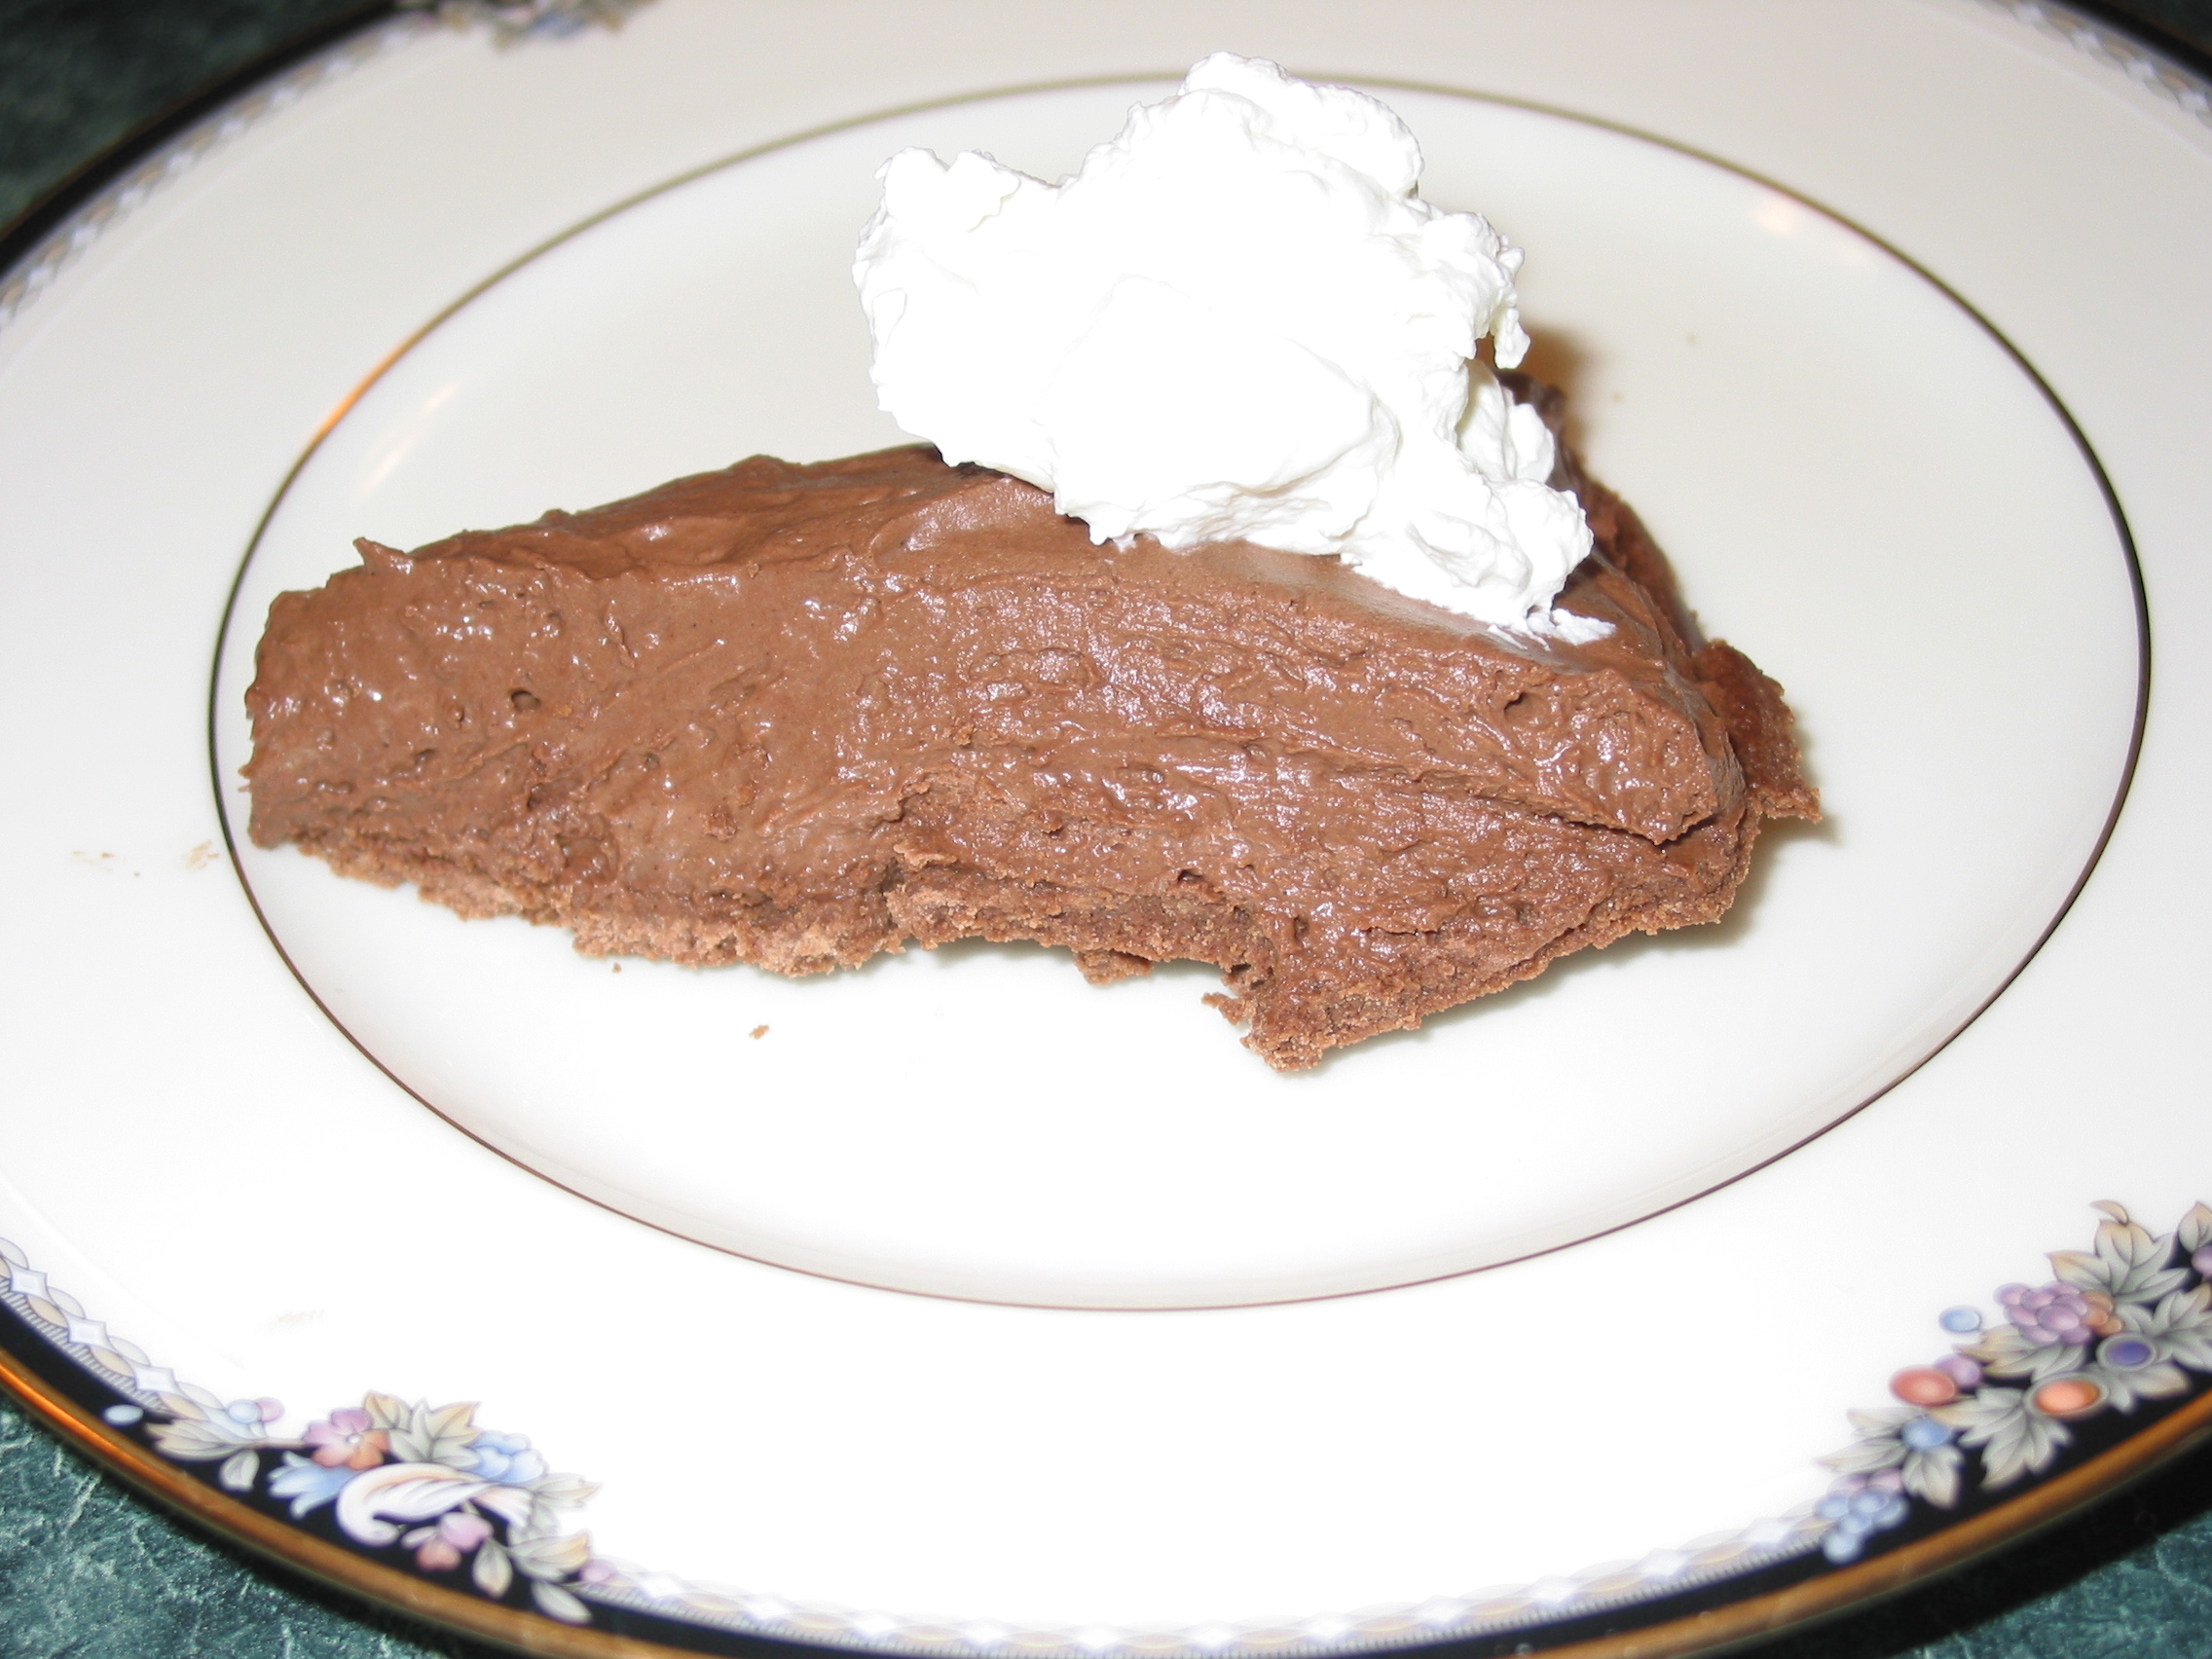
11. Refrigerate at least overnight. This is necessary to develop full
flavor and a uniform, firmer texture (image).
Refrigerating it an additional day improves it even more. Keep it tightly covered
to avoid dehydration and absorption of refrigerator odors.
12. Optionally top with sweetened whipped cream (I use 1 t sugar per 1 C cream), perhaps flavored with vanilla or a liquer infusion (Bailey's, Frangelico, Tia Maria, Nocello).
Notes and Variations
This recipe does not include uncooked or undercooked eggs. It is fully cooked with no risk of food-borne illness. Consequently, it also lacks the taste of undercooked egg, so if this is something you're looking for in your mousse (which I was not), then it is not the one for you.
As written, the recipe has an intense, somewhat dark chocolate flavor. It's not bitter, but if you dislike dark chocolate, try using 4 one-ounce squares of milk chocolate instead of the 4 one-ounce squares of bittersweet chocolate. (Not tested yet)
If you prefer a less intense chocolate flavor, use more whipped cream.
For a chocolate mocha mousse, substitute cold fresh brewed quality coffee for the water. (Not tested yet but looking forward to it)
The quality of your chocolate will affect the outcome. Most of the failure complaints I read about the precursor recipe involved using poor quality chocolate or overheating the egg mixture.